Two questions come before any brand recommendation, and getting them wrong is what turns a speaker upgrade into a weekend of swearing.
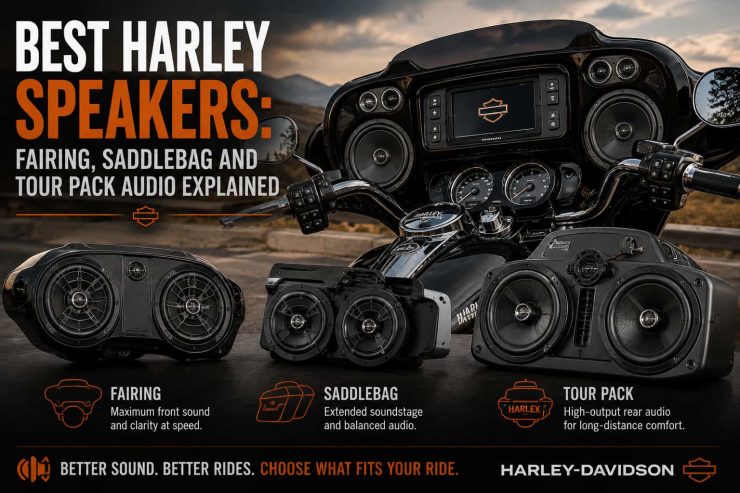
The first is size. A 1998-2013 Harley batwing fairing takes 5.25-inch speakers. A 2014-and-later Touring fairing takes 6.5-inch. Saddlebag lids take 6×9. Fit the wrong one and you are either cutting plastic or shipping it back.
The second is power. Most riders who complain that their new speakers sound no better than stock have hit the same wall: a factory Harley head unit puts out roughly 25 watts per channel, and a lot of aftermarket speakers need considerably more before they wake up. The speakers were fine. The amplifier that was never fitted was the problem.
This guide handles both, then goes further than a product list: where speakers can go on a Harley beyond the fairing, what Harley’s own Stage 1, 2 and 3 tiers actually mean, how to install and wire a system, how to tune it so it is still audible at 70 mph, and how to stop it dying in the first wet winter. The best speakers for a Harley Street Glide – or any bagger – are the ones that match your fairing, your head unit and how loud you actually ride.
#1 Pick: Best Harley Speakers
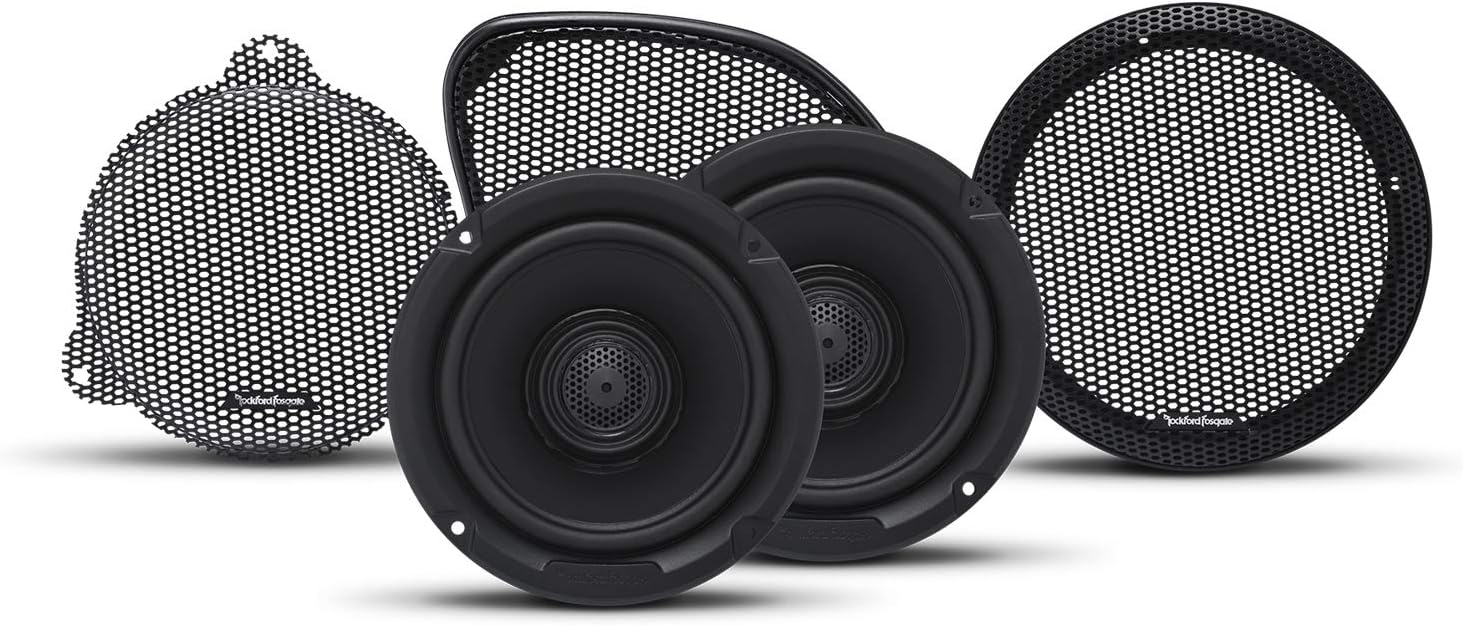
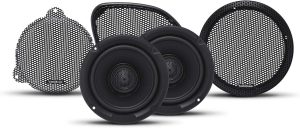
Rockford Fosgate TMS65 6.5" Fairing Speakers
For a 2014-or-later Touring bike, this is the straightforward answer: Rockford Fosgate is Harley’s own audio partner, the TMS65 drops into the factory location with no modification, and it is engineered around the stock head unit’s power and impedance so it works properly without an amplifier.
Riding a 1998-2013 bagger? The Hogtunes 352F-AA further down has 898 ratings, costs a third as much and is designed for the same low-power constraint. And whichever you fit, read the amplifier section first – it is the difference between a good upgrade and a disappointing one.
The top best product [hide]
What Size Speakers Does Your Harley Take?
This is the single most common question in the category, and the answer depends on the generation of your bike rather than the model name.
| Location | Model / year | Speaker size |
|---|---|---|
| Batwing fairing | Touring 1998-2013 (Street Glide, Electra Glide, Ultra) | 5.25 inch |
| Batwing fairing | Touring 2014 and later (Project Rushmore) | 6.5 inch |
| Sharknose fairing | Road Glide 1998-2013 | 5.25 inch |
| Sharknose fairing | Road Glide 2015 and later | 6.5 inch |
| Saddlebag lids | Touring, with aftermarket or cut lids | 6×9 inch |
| Lower fairings | Touring, with speaker pods | 6.5 inch |
| Tour pack | Touring, with speaker kit | 5.25 or 6.5 inch |
Can you fit 6.5-inch speakers in a 5.25-inch fairing?
Yes, and a lot of riders do. It needs adapter rings, which are cheap, and on some fairings a small amount of trimming. The payoff is real – a 6.5-inch cone moves more air and produces midbass that a 5.25 physically cannot. If you are already inside the fairing, the incremental cost of doing it properly is a set of rings and half an hour.
What you cannot do is go the other way and expect it to look right, or drop a 6×9 into a fairing.
Impedance matters too
Harley factory systems commonly run 2-ohm speakers, while most car audio speakers are 4-ohm. Fit 4-ohm speakers to a stock head unit and you get less power delivered, not more – which is another reason upgrades sometimes sound disappointing. Harley-specific speaker lines from Rockford Fosgate and Hogtunes are built with this in mind. Generic car speakers are not.
Where Speakers Go on a Harley
The fairing is where everyone starts, but it is one of five locations, and the others are where most of the untapped sound is.
Fairing (front speakers)
The pair either side of the instruments, firing at your chest. This is the foundation of any system and the first thing to upgrade. On a bagger they do the vocals and the midrange – the part of the music that road noise eats first.
Lower fairings
Speaker pods built into the vented lowers on Touring bikes. Adding a pair here is the most underrated upgrade on the list: they sit closer to your legs, they add midbass the fairing speakers cannot produce, and they fill in the bottom end without a subwoofer. Note that fitment gets fiddly – twin-cooled models and several recent years have exclusions.
Saddlebag lids (rear speakers)
6x9s mounted in the bag lids, firing up and back. This is what turns a front-only system into something you can hear properly with a passenger, and it is how you get real bass on a bike. Two routes: buy aftermarket lids with the cutouts already made, or cut your stock lids. Buying lids is the sane option unless you are confident with a jigsaw and a template.
Tour pack
Rear-firing speakers in the tour pack, aimed at the passenger. If someone rides with you regularly this matters more than another pair up front. Kits exist for standard, King and Razor packs, and they are not interchangeable.
Handlebar and crash bar
Self-contained speaker pods that clamp to the bars or the engine guard, usually with a built-in amplifier and Bluetooth. This is the route for bikes with no fairing at all – Sportsters, Dynas, Softails – and for anyone who wants music without touching the wiring. They are not as good as a proper fairing system, but they are a fraction of the price and they install in twenty minutes.
Harley Stage 1, Stage 2 and Stage 3 Audio: What They Mean
Harley uses a tiered naming system for audio upgrades, and Rockford Fosgate – Harley’s long-standing audio partner – sells kits matching the same tiers. Riders search for these by name, so it is worth knowing what you are buying.
Stage 1: speakers only
Replace the fairing speakers, keep the factory head unit and its built-in amplification. The cheapest upgrade and the easiest. Works best with speakers specifically designed to run efficiently on low power – which is precisely what Harley-specific lines are engineered for. Expect a clear improvement in clarity, not a dramatic increase in volume.
Stage 2: speakers plus an amplifier
Add an external amp driving the fairing speakers. This is where the system stops being a compromise. Going from 25 watts a channel to 100-plus transforms how the speakers behave at speed, because headroom is what keeps music clean when you roll the throttle on. Most riders who are serious about audio end up here.
Stage 3: front and rear, amplified
Fairing speakers, saddlebag or tour pack speakers, and a four-channel amplifier driving all of them. Full-bike sound, audible at highway speed, and enough for a passenger. It is a genuine install – wiring runs from the fairing to the bags, and on kit systems the head unit usually needs a dealer to flash it so it recognises the new configuration.
You do not have to buy a branded kit to build any of these. The tiers describe a system architecture, not a part number.
Do You Need an Amplifier?
This is the question that decides whether your upgrade succeeds, so it is worth being blunt about it.
A factory Harley head unit produces around 25 watts per channel. That is enough to drive the speakers it came with, at the volumes Harley considered reasonable, with a fairing and a windshield in front of you. It is not much.
When you can skip the amp
- You are replacing speakers with a Harley-specific set designed for stock power. Several lines are engineered around low-wattage head units and 2-ohm impedance. Owners regularly run these with no amp and report a clear improvement.
- You mostly ride at moderate speeds and want clarity rather than volume.
- You are fitting self-contained handlebar speakers, which have their own amplification built in.
When you need one
- You want to hear music clearly above 60-70 mph. Wind noise rises faster than you expect, and without headroom the amp clips before it gets loud enough.
- You are fitting speakers with low sensitivity – anything rated below roughly 90 dB will feel flat on stock power.
- You are adding rear speakers. A stock head unit cannot drive four speakers properly.
- You already replaced the speakers and were underwhelmed. This is the single most common story in this category, and the amp is usually the missing piece.
What to look for in a motorcycle amp
Compact Class D, because there is nowhere to put anything else. Weather-resistant or fully sealed – a bike amp lives outdoors. Enough RMS power to match your speakers rather than headline peak numbers. And check the inputs: if your head unit only has speaker-level outputs, the amp needs speaker-level inputs or you will need a line-output converter.
One warning specific to full kit systems: several require the dealer to flash the radio so it recognises an external amp. Budget for that, or you will have hardware installed and no sound.
Best Fairing Speakers for Harley
The front pair is the foundation of any system. Four options below, split by which generation of fairing you have – check the fitment line before anything else.
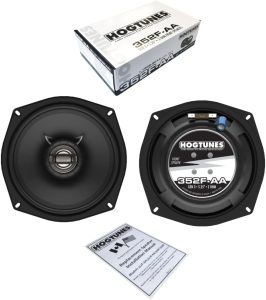
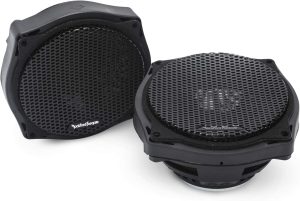
Hogtunes 352F-AA 5.25" Front Speakers
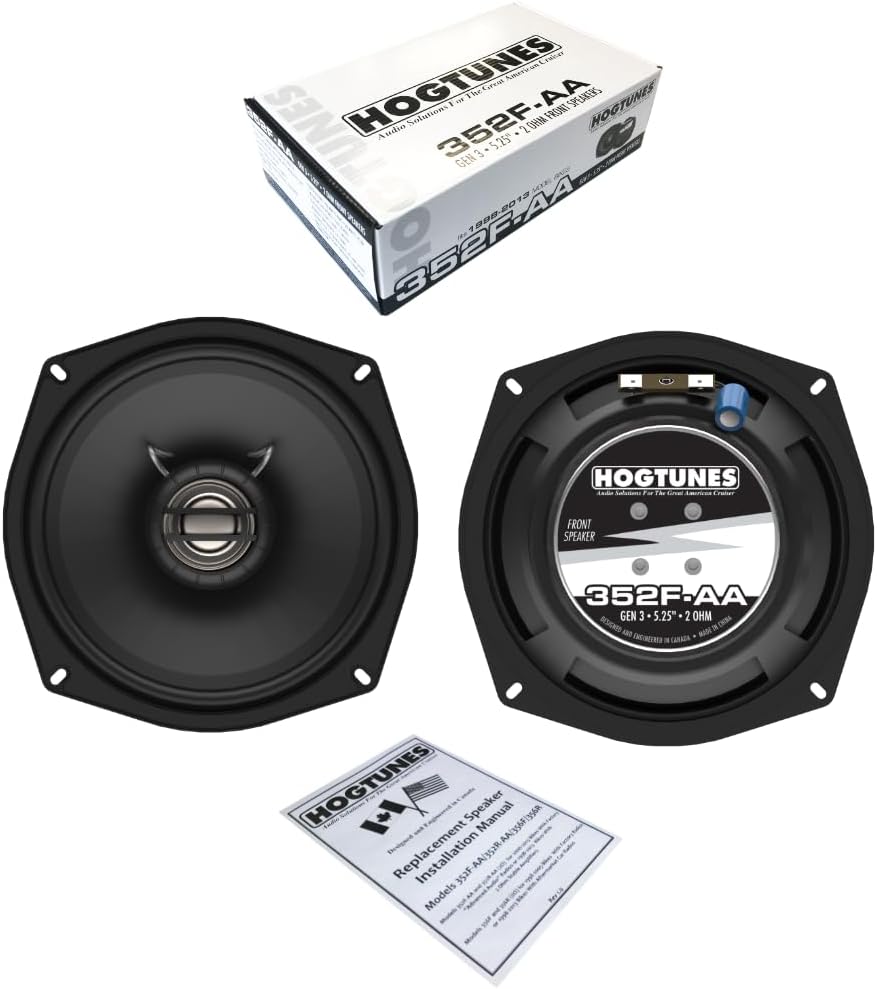
Fits: all 1998-2005 and 2006-2013 Touring models. 5.25 inch, sold as a front pair.
Amplifier: not required. Designed to run on a stock Harley head unit.
Rating: 4.6 / 5 from 898 ratings
With 898 ratings this is the most-reviewed fairing speaker in the guide, and it is the sensible starting point for a 1998-2013 bagger. Hogtunes builds only for Harleys, and the whole design brief here is efficiency: producing usable volume from the roughly 25 watts a factory head unit puts out, rather than needing an amplifier to come alive. Owners consistently mention the magnet – substantially larger and heavier than the stock unit, which is where the extra output comes from. Installation is a straight swap with no wire cutting, using the factory grills. At around $156 for the pair it is a fraction of what the premium options cost, and for a rider who wants clearer vocals around town rather than highway-volume music it is often all that is needed. Expect an improvement in clarity rather than a transformation – a few owners note the jump from stock is real but not dramatic, which is a fair description of any Stage 1 upgrade.
What owners say: “Fit and works perfectly. Way larger and heavier magnet than the stock speakers. – Thomas, 2013 FLHTC”
Rockford Fosgate TMS65 6.5" Fairing Speakers
Fits: 2014-current Street Glide and 2015-current Road Glide. Compatible with the factory Boom! audio system. 6.5 inch pair.
Amplifier: not required. Designed to work with the factory head unit.
Rating: 4.6 / 5 from 271 ratings
Rockford Fosgate is Harley’s long-standing audio partner, and the TMS65 is the direct-fit answer for the post-Rushmore fairing. That matters more than it sounds: these are engineered around the factory head unit’s power and impedance rather than adapted from a car audio line, which is why they work properly without an amplifier when so many 6.5-inch speakers do not. Mounting uses the factory hardware and connectors with no modification. Owners describe them as noticeably louder than the OEM speakers with better tonal balance, and the common phrase in reviews is being able to hear clearly at speed. One realistic note from the reviews: installation on a Street Glide is more involved than the marketing suggests, mostly because of the amount of inner fairing that has to come off. Budget more than the advertised half hour if it is your first time behind that fairing.
What owners say: “These RF speakers are louder than the OEM Harley speakers and have better sound. – Jack McGraff, Road Glide”
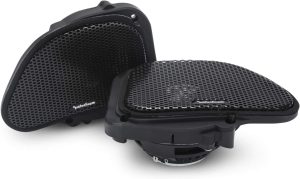
Rockford Fosgate TMS6SG 6.5" Fairing Speakers
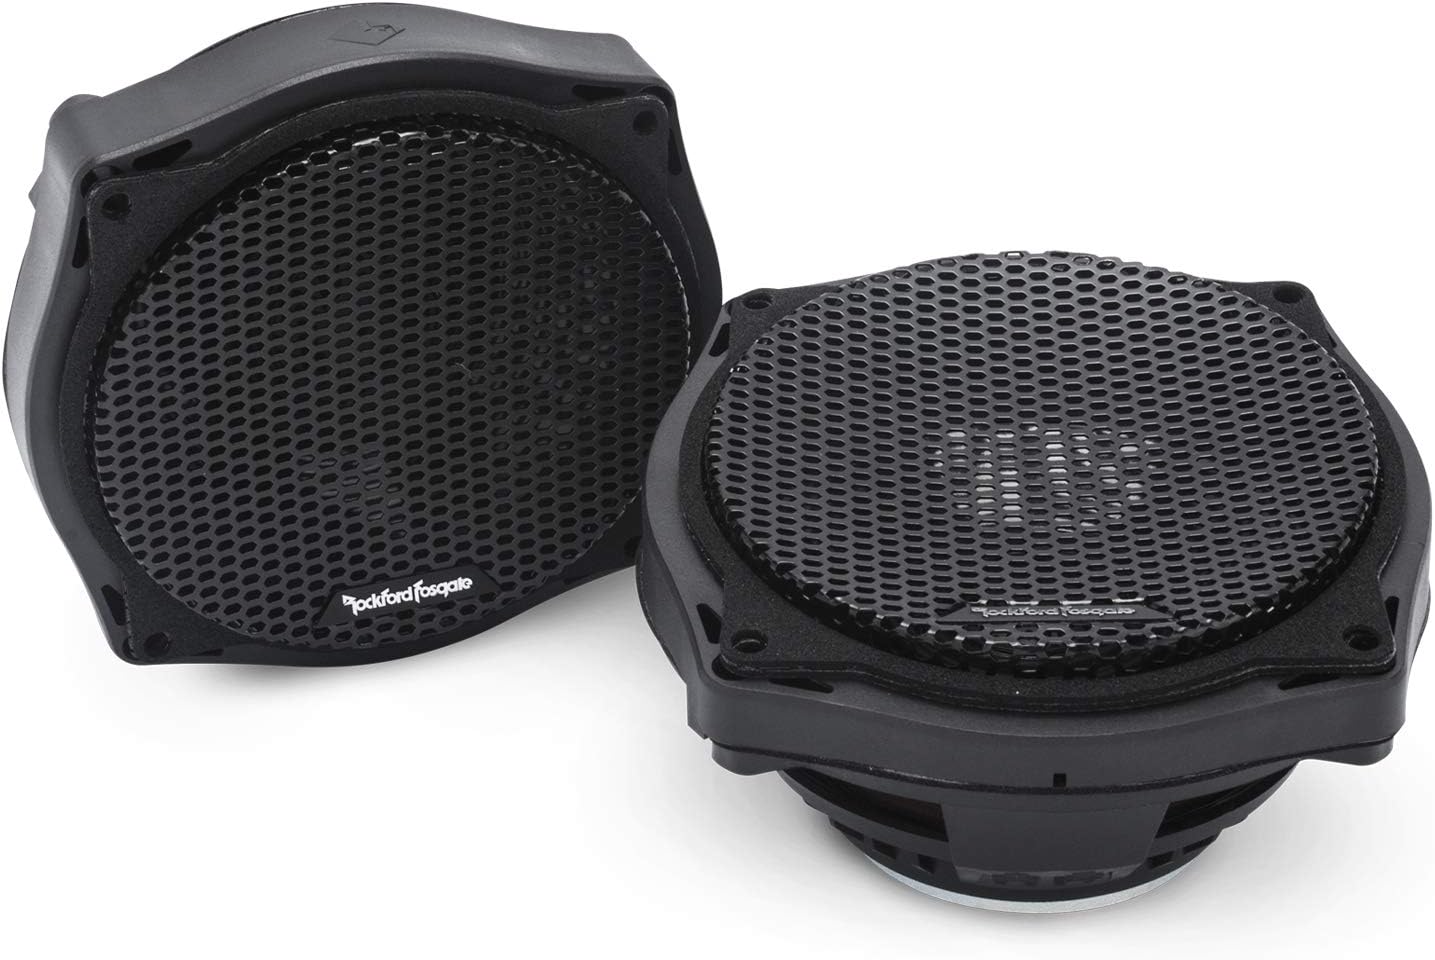
Fits: Electra Glide 1998-2013 and Street Glide 2006-2013. These are 6.5 inch speakers that drop into the 5.25 inch factory location.
Amplifier: not required by the manufacturer, though one owner reports the factory head unit benefits from being flashed.
Rating: 4.6 / 5 from 291 ratings
This is the interesting one for owners of older baggers. It is a 6.5-inch speaker engineered to mount in the 5.25-inch factory fairing location using the factory hardware – so you get the larger cone and the midbass that comes with it, without adapter rings and without trimming. Rockford states no modification is needed and it drops straight in. Owners back that up, with the recurring description being a direct fit and a large upgrade over the factory speakers, playing at full power without distortion. There is one caveat worth taking seriously. Reviews contain a disagreement about whether the stock head unit is enough: most owners run them as-is and are happy, while at least one insists the factory deck needs flashing to do them justice. If you are spending $440 on speakers, having the radio checked at the same time is a reasonable precaution.
What owners say: “Direct fit as they were intended, sound is amazing. It’s a huge upgrade over the factory speakers. – Whitewater”
Rockford Fosgate TMS6RG 6.5" Fairing Speakers
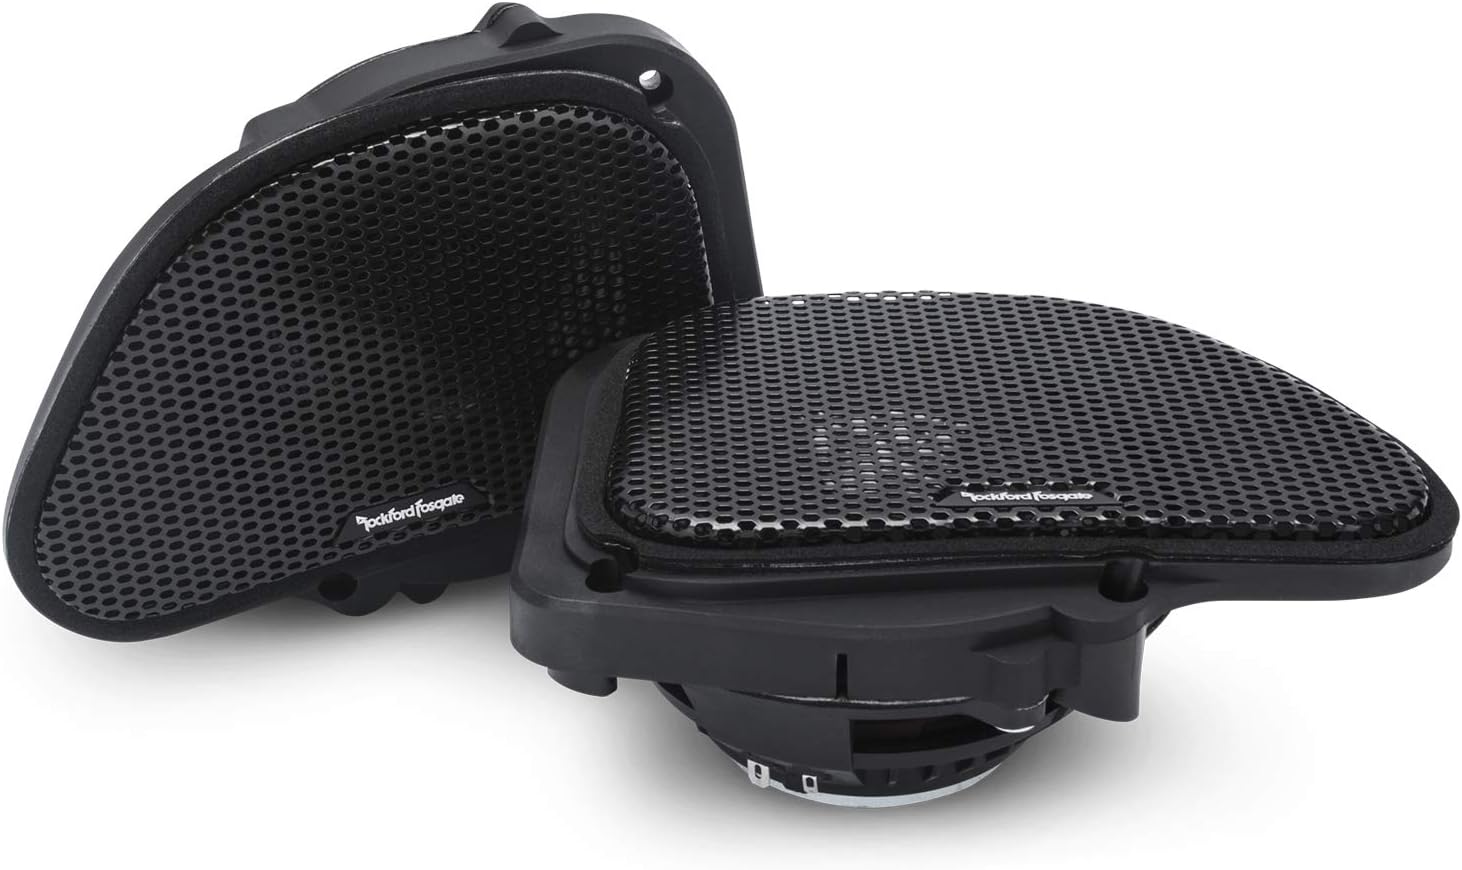
Fits: Road Glide 1998-2013 fairing speaker locations. Installation on CVO and Screamin’ Eagle models needs checking against the manufacturer’s list.
Amplifier: recommended. This is the one product here where owner consensus is clear that the stock head unit is not enough to do them justice.
Rating: 4.6 / 5 from 126 ratings
The Road Glide equivalent of the TMS6SG – 6.5-inch drivers that mount in the sharknose fairing using factory hardware, shipped pre-assembled with a direct-fit grille. Owners describe the install as genuinely simple, with the usual comment that the worst part is getting the fairing off rather than anything to do with the speakers. What separates this from the others in this section is the amplifier question. Reviews here show a clear pattern: riders who added an amp are delighted, and the disappointed reviews come almost entirely from people running them off the stock deck and expecting $440 speakers to sound like $440 speakers on 25 watts a channel. If you are buying these, plan on a Stage 2 setup rather than treating the amplifier as optional. On that basis they are excellent. Without one, you may well conclude you overpaid.
What owners say: “I dropped the Rockfords in this morning. Perfect fit and simple install. – Anthony”
Best Handlebar and Bluetooth Speakers
For Sportsters, Dynas, Softails and anything else without a fairing, a self-contained bar-mounted system is the whole answer in one box.
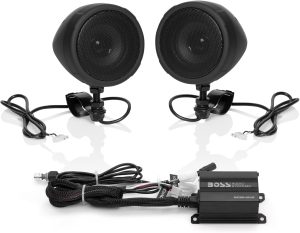
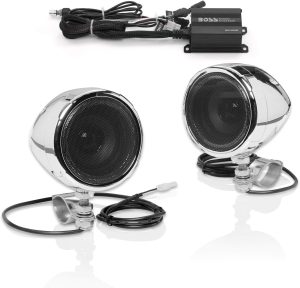
BOSS Audio MCBK420B Handlebar Speaker System
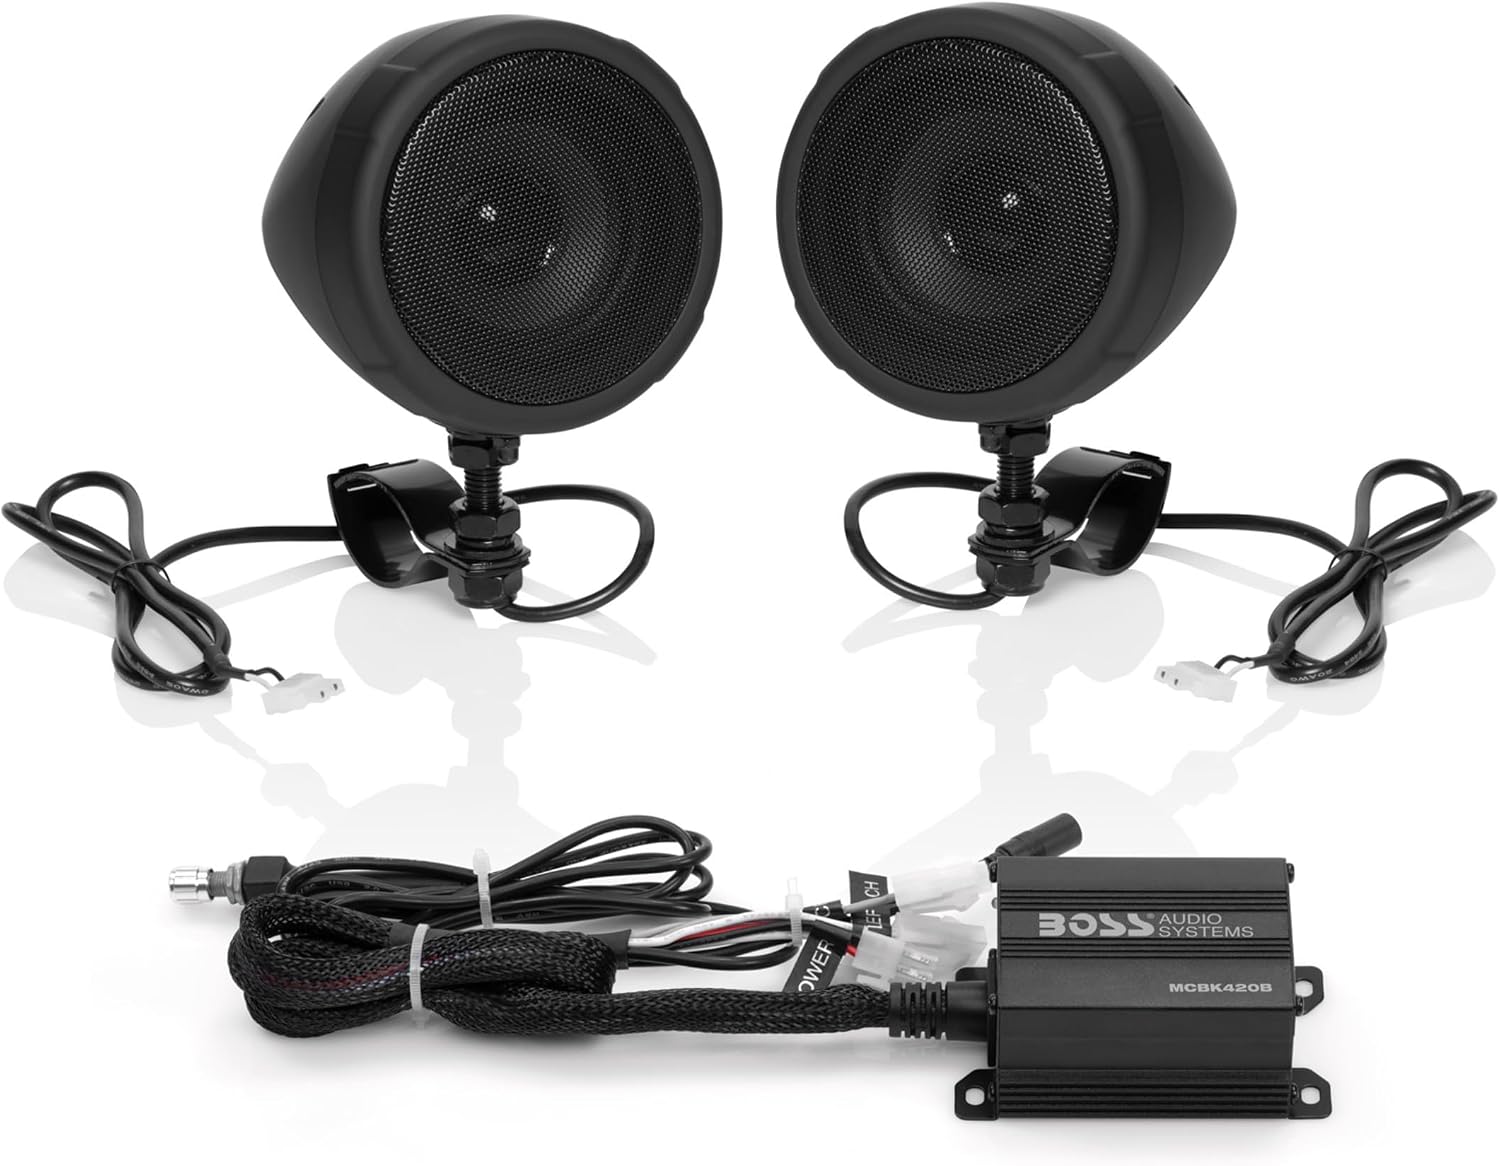
Fits: universal. Adjustable brackets clamp to handlebars from 0.75 to 1.25 inches. Not Harley-model specific – it will fit a Sportster, Dyna, Softail or anything else with a round bar.
Amplifier: built in. A compact Class D amp is part of the unit.
Rating: 4.3 / 5 from 3,843 ratings
With 3,843 ratings this is the most-reviewed product in the entire guide, and it occupies a completely different niche from everything else here. There is no fairing to work behind, no adapter rings and no wiring loom to route: two three-inch weather-resistant pods clamp to the bars, the built-in Class D amplifier handles power, and Bluetooth handles the source. For a Sportster, a Dyna, a Softail or any bike that never had audio, this is the entire system in one box for under a hundred dollars. Be realistic about what it is. Three-inch drivers do not produce bass, and owners describe it as loud and clear up to around 40-50 mph, after which wind starts to win. That is a fair trade at the price. It is not a substitute for a fairing system on a bagger – it is the answer for bikes where a fairing system is not an option.
What owners say: “I’ve got an Indian Scout 60 Bobber with an exhaust and it’s pretty loud. – Derrick Hatfield”
BOSS Audio MC420B Handlebar Speakers, Chrome
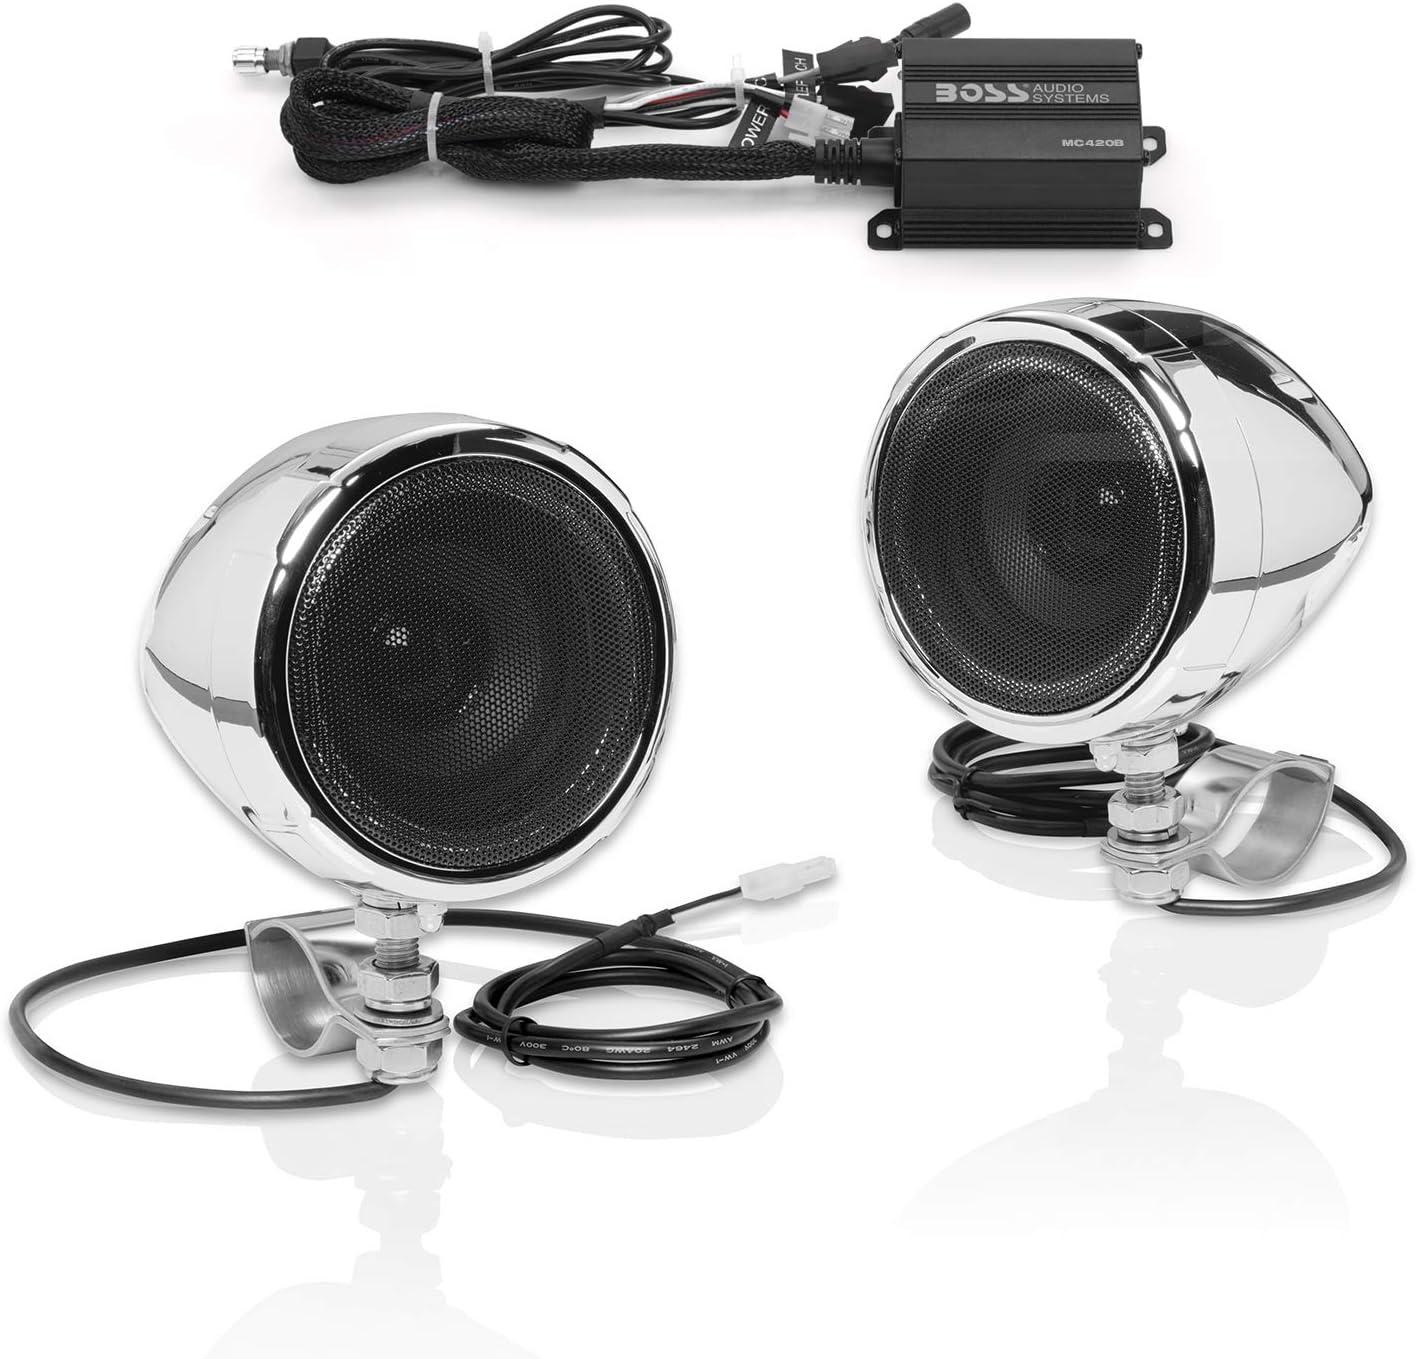
Fits: universal. Adjustable clamps for 0.75 to 1.25 inch handlebars. No Harley year or model restriction.
Amplifier: built in.
Rating: 4.2 / 5 from 3,406 ratings
Mechanically the same proposition as the MCBK420B in a chrome finish, and with 3,406 ratings it has a comparable track record. If your bike is a chrome build rather than a blacked-out one, this is the version to buy – the specification is otherwise the same, with two three-inch drivers, an integrated Class D amplifier and Bluetooth. Owners on Sportsters describe it as genuinely good value that does the job at moderate speeds, which is exactly the right expectation. The recurring criticism in reviews is the wiring: the harness is longer and more involved than the bar-clamp simplicity of the mounting suggests, and tidying it so it does not look like an afterthought takes longer than fitting the speakers themselves. Plan for cable ties and half an hour of routing.
What owners say: “Sound is awesome for a $60 system, at 40mph and lower. – Door Man, 2008 Sportster 1200”
Best Amplifiers for Harley Audio
If your speakers sound flat at speed, this is the missing piece. Two options: a two-channel Stage 2 amp, and a complete Stage 3 kit.
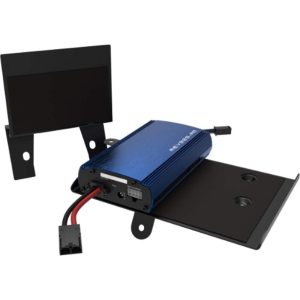
Hogtunes REV 225-RM 225W 2-Channel Amplifier
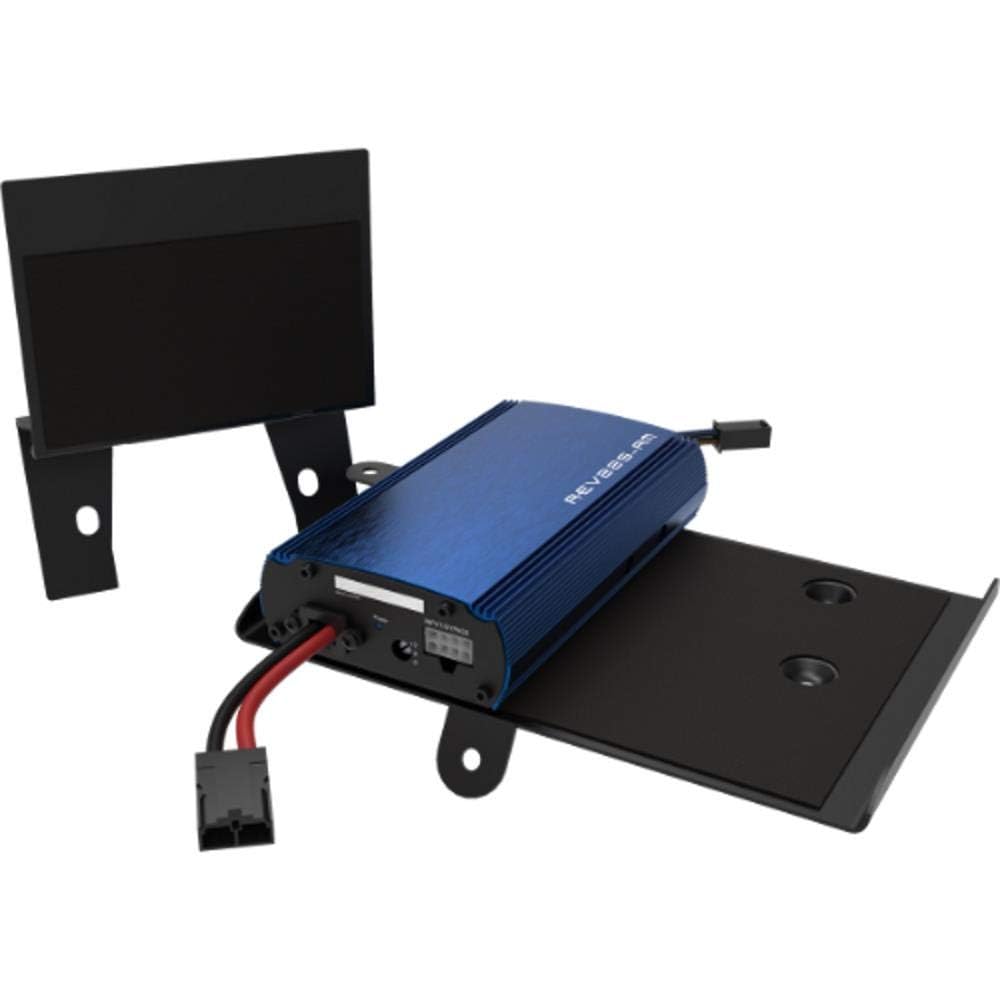
Fits: all 2014-2023 Touring models, plus 2024 Ultra Limited and Tri Glide. Compact at 6.8 x 4 x 1.5 inches.
This is the amplifier. 225 watts RMS across two channels.
Rating: 4.4 / 5 from 49 ratings
If you have fitted good fairing speakers and they still sound flat at speed, this is the missing component. Going from the roughly 25 watts a channel a factory head unit provides to 225 watts RMS across two channels is not about being louder in the driveway – it is about headroom, which is what keeps music clean when wind noise rises and you instinctively turn it up. Hogtunes designs specifically for Harleys, so the kit ships with plug-and-play harnesses and requires no wire cutting, and the amplifier itself is small enough to hide. An owner running it on a 2023 Road Glide called the install a pain but well worth it, which is an honest summary of a Stage 2 job: the wiring and the power connection at the battery take the time, not the amplifier itself. The review base is small at 49 ratings, but the fitment is explicit and the product is purpose-built rather than adapted.
What owners say: “PITA to install, but well worth it. – Jon Do, 2023 Road Glide”
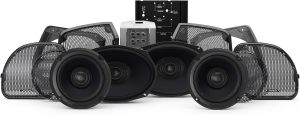
Rockford Fosgate HD14RGSG-STAGE3 Audio Kit
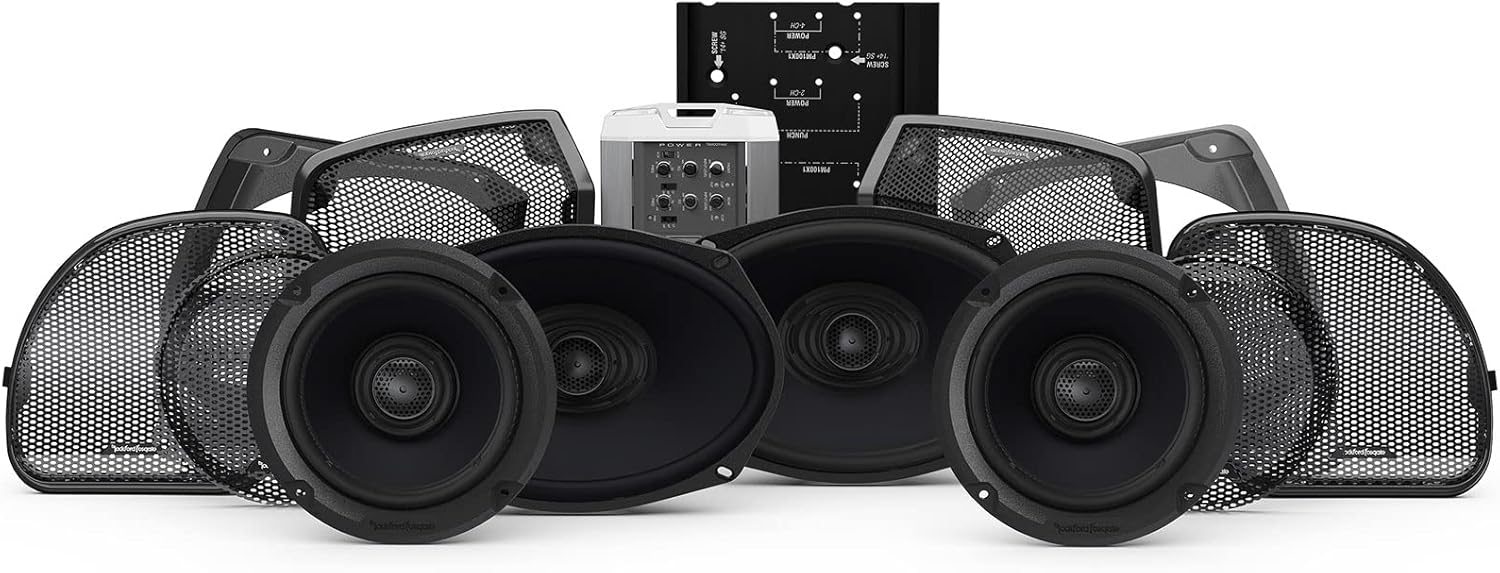
Fits: select 2014-2023 Road Glide and Street Glide. Bolts to factory attachment points. A Road Glide is a noticeably easier install than a Street Glide.
Includes a 400 watt RMS 4-channel amplifier plus front and rear speakers.
Rating: 4.5 / 5 from 167 ratings
The complete Stage 3 package in one box: a 400-watt four-channel amplifier, 6.5-inch fairing speakers and rear speakers, all matched and all designed to bolt to factory attachment points. This is the system that makes a bagger genuinely audible at highway speed with a passenger aboard, and with 167 ratings it has a real track record. Two things to understand before you buy, because they are not optional extras. First, the radio has to be flashed so it recognises the external amplifier – either at a dealer or by you if you have the means. Skip that and you have expensive hardware and no sound. Second, the saddlebag lids need cutting to a template, which means a step bit and a jigsaw and roughly four hours of careful work. Owners rate it highly, but the honest characterisation from the reviews is that the amplifier and harness are excellent and the install is the real cost.
What owners say: “Road Glide is a much easier install than a Street Glide, so keep that in mind. – Mark, 2019 Road Glide Special”
Lower Fairings, Saddlebags and Rear Sound
Everything beyond the fairing pair. This is where the midbass and the passenger-side sound come from.
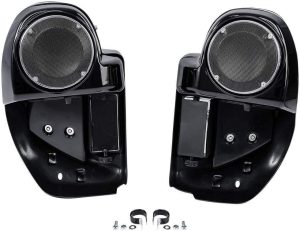
TCMT 6.5" Lower Fairing Speaker Pods
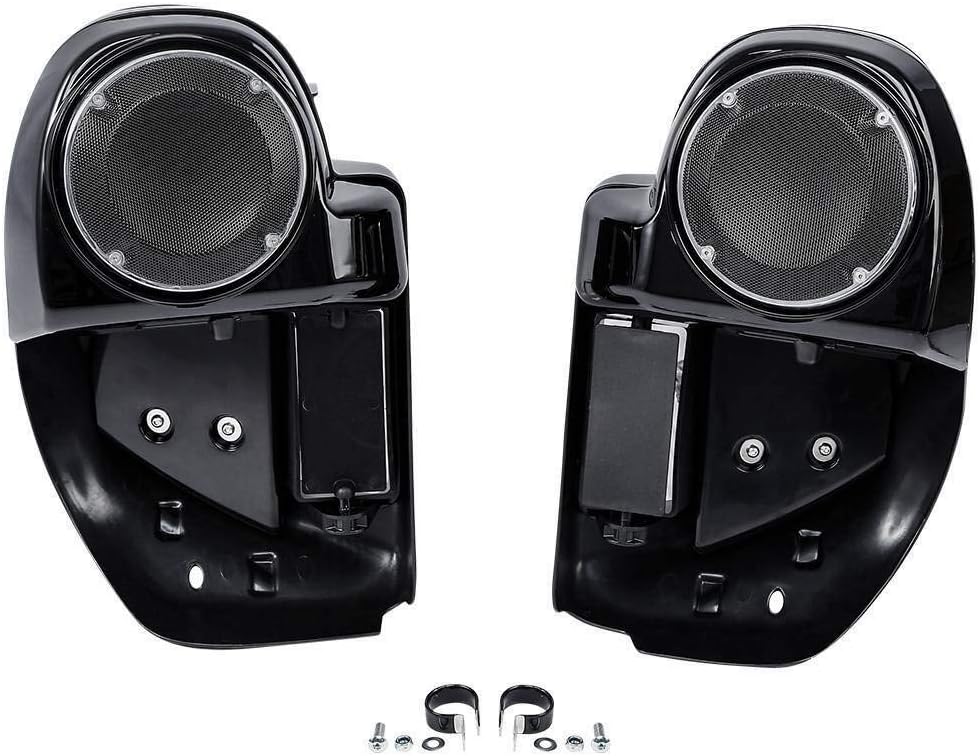
Fits: 2014-later air-cooled Touring and Trike models. Does NOT fit twin-cooled models, 2018-later FLTRXSE, or several 2023-and-later CVO models. Check the exclusion list carefully.
Speakers not included – this is the enclosure.
Rating: 4.6 / 5 from 115 ratings
Lower fairing pods are the most underrated upgrade on a bagger. They sit close to your legs, they add the midbass the fairing speakers physically cannot produce, and they fill in the bottom end without a subwoofer. These arrive as a pre-assembled left and right pair with the 6.5-inch enclosures built in, so there is no garage assembly, and they bolt to the existing engine guard. Speakers are not included, which is the point – you choose the drivers. Owners fitting quality speakers into them report the result sounding excellent. Two practical notes from the reviews. You have to drill your own hole to route the speaker wire into the pod, which is straightforward but worth knowing before you start. And the fitment exclusion list is long and specific, so read it against your exact model and year rather than trusting the headline year range.
What owners say: “Excellent quality. Includes the speaker covers which look great on my bike. – magiq”
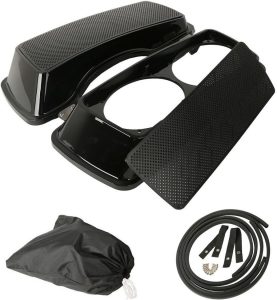
Dual 6x9 Speaker Saddlebag Lids
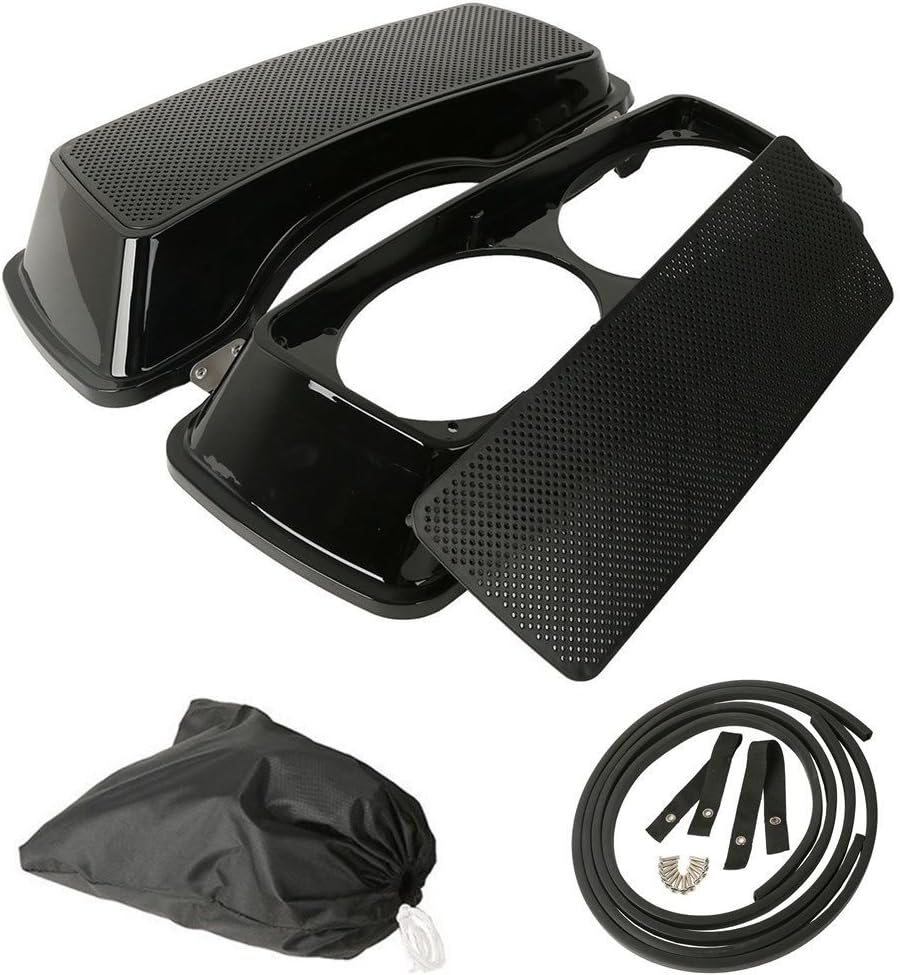
Fits: Harley Touring saddlebags. The listing contradicts itself – bullets say 1993-2013, the description says 1994-2013. Verify against your bags before ordering.
Speakers not included. Four 6x9s will need amplification.
Rating: 4.6 / 5 from 146 ratings
The pragmatic way to add rear sound without taking a jigsaw to your painted saddlebag lids: buy lids that already have the cutouts and grills. These take two 6×9 speakers per side – four in total – which is a serious amount of rear cone area for the money. Owners report the fit as good, with the common adjustment being trimming the supplied seals slightly for a clean close. One acoustic point worth understanding before you commit: lids fire straight up, so the sound goes over your shoulders rather than at you. That is excellent for a passenger and for filling in the low end, and it is why rear speakers complement rather than replace the fairing pair. Note the contradictory year range on the listing, and note that four 6x9s are not something a stock head unit can drive – this is a Stage 3 component and it needs an amplifier behind it.
What owners say: “The product fit very well, I had to reduce the thickness of the seals that came with it. – John M. Noble”
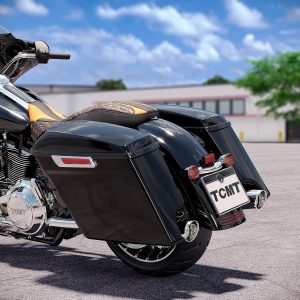
TCMT 5" Stretched Saddlebags with 6x9 Speaker Lids
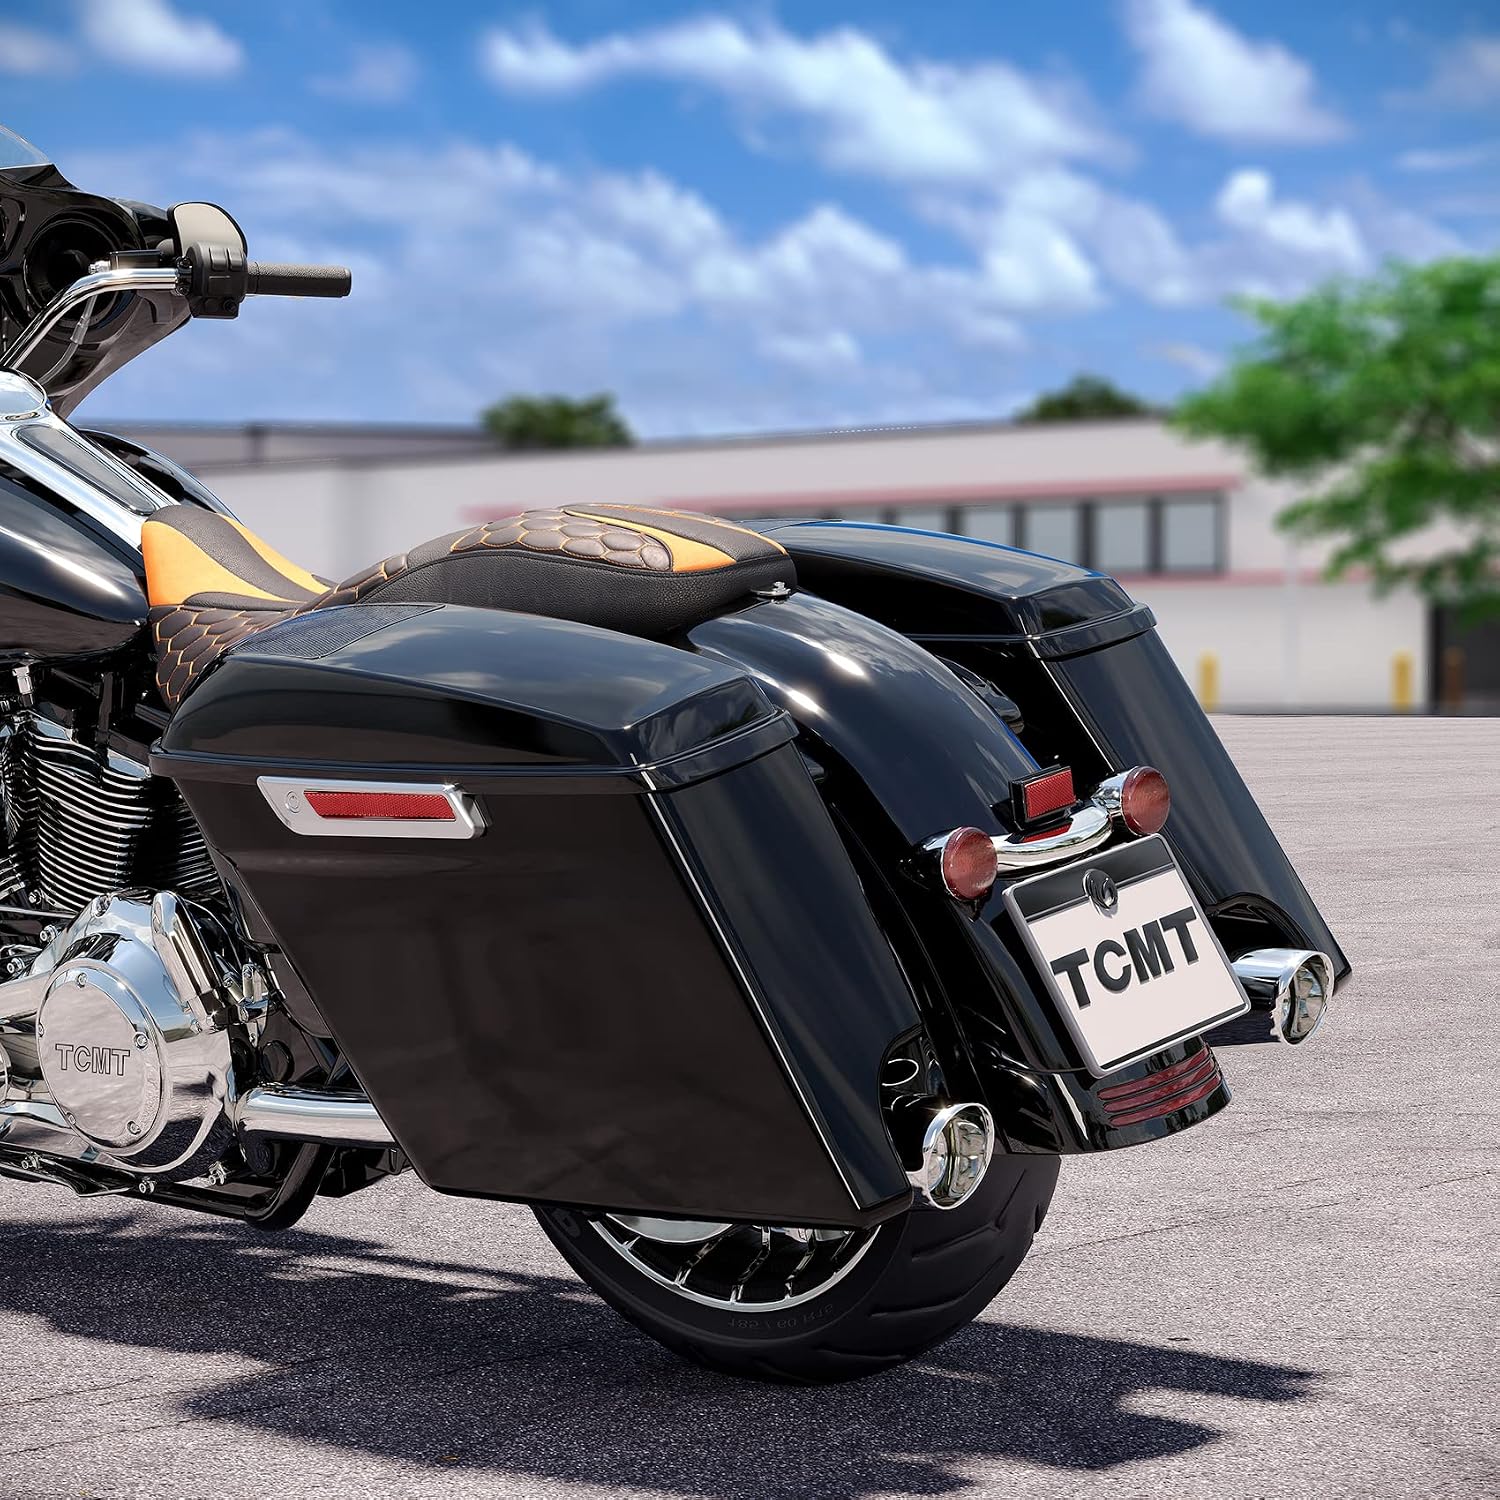
Fits: 2014-2024 Touring – Road King, Road Glide, Street Glide, Electra Glide, Ultra Classic. Mounts to the factory saddlebag locations.
Speakers not included.
Rating: 4.6 / 5 from 289 ratings
If you want stretched bags and rear speakers, doing both in one purchase saves buying bodywork twice. These are 5-inch stretched saddlebags supplied as a pair with the lids already cut for 6×9 speakers, mounting to the factory locations with no modification claimed. With 289 ratings it is the best-reviewed bodywork item in this guide. The look is the main driver for most buyers – stretched bags change the profile of a bagger significantly – and getting the speaker cutouts as part of the same part is a genuine convenience. Reviews are positive on finish and fit, with the usual caveats that come with painted bodywork bought online: a small number of owners report mounting adjustments at the bottom bracket, and one notes that the seller resolved an issue promptly. If you are also fitting the exhaust bracket from our exhaust guide, note that stretched bags are exactly the case where adjustable brackets become necessary.
What owners say: “Look amazing! I had a small issue but the seller made it right. – Gabriel G”
Adapters and Accessories
The small parts that make the rest of it work.
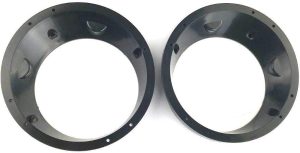
6.5" Speaker Adapter Rings for 1996-2013 Touring
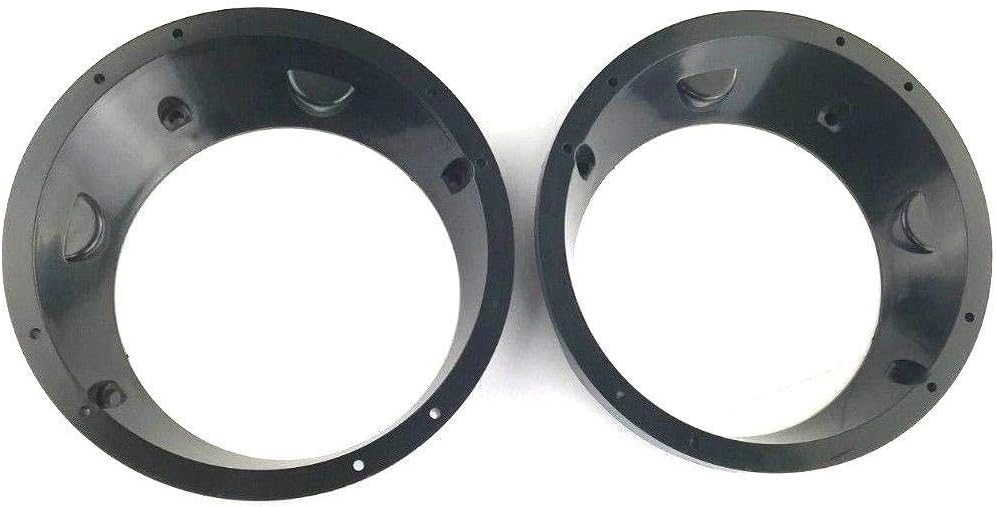
Fits: 1996-2013 Harley Touring fairings. Check the compatibility list in the product description, which is narrower and more precise than the headline bullet.
Rating: 4.6 / 5 from 215 ratings
A fourteen-dollar part that unlocks the whole 6.5-inch upgrade route on older baggers. Factory fairings from 1996 to 2013 are cut for 5.25-inch speakers; these adapter plates let a 6.5-inch driver mount in that opening. The payoff is a larger cone that moves more air, which is the single biggest step up in sound available to a pre-2014 fairing. Instructions are included and owners describe the fit as exact with a straightforward install. One tip that comes directly from a reviewer and is worth repeating: the kit includes six screws, several of which are not needed, and using them all risks damaging the fairing or the speaker. Use what the instructions call for and put the rest in the parts bin. If you are choosing between a 5.25-inch speaker and a 6.5-inch plus these rings, the rings are the better spend.
What owners say: “The product worked as intended. Very easy to install and fit perfectly. – Ricco, 2012 Electra Glide Classic”
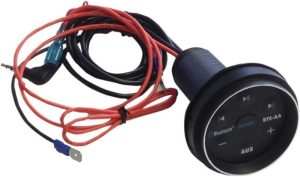
Hogtunes BTS-AA In-Fairing Bluetooth Music Controller
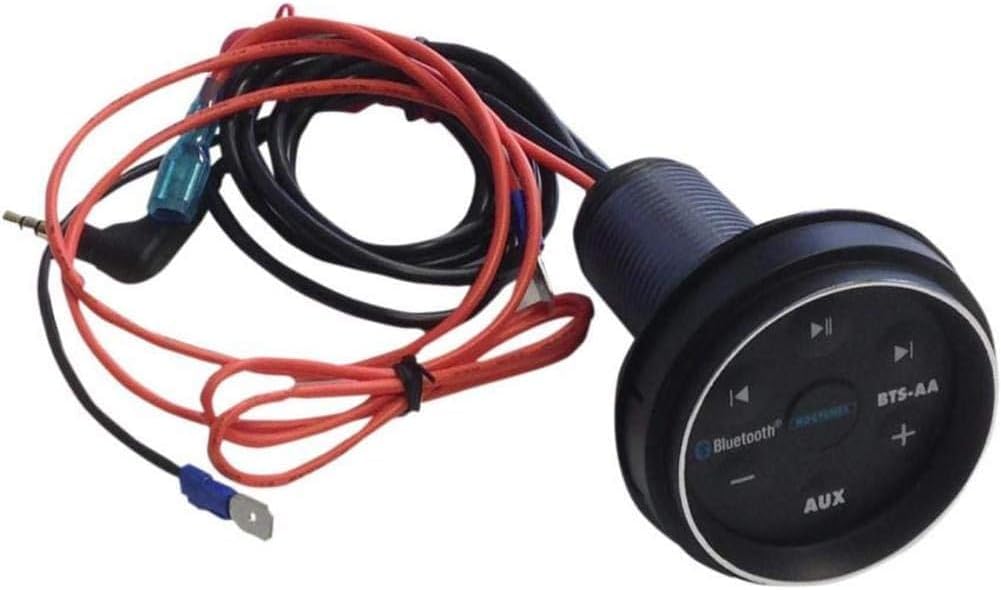
Fits: 1999-2013 Harley Touring. Replaces the factory ambient air temperature gauge in the fairing gauge cluster.
Rating: 4.6 / 5 from 360 ratings
A neat solution to a specific problem: pre-2014 Harley radios have no Bluetooth, and the workarounds usually involve a phone cable draped across the fairing. This unit replaces the factory ambient temperature gauge with a Bluetooth receiver and controller that looks like it belongs there, so streaming works through the stock stereo with the controls where your hand already is. Marketed as plug and play with no wire cutting, and owners generally describe the fit and function as exactly as advertised. Two honest notes from the reviews. The install is more time-consuming than plug and play implies, because you are into the gauge cluster. And depending on your setup you may still have an aux cable to route, which slightly undercuts the tidiness. For a 1999-2013 bagger where the alternative is replacing the whole head unit, it is a sensible middle path at $149.
What owners say: “Absolutely amazing. Fit perfect and functioned perfect. – Tyson”
How to Install Harley Speakers
Fairing speakers are a genuinely approachable job. Rear speakers and amplifiers are a bigger commitment. Here is what each actually involves.
Fairing speakers: about an hour
- Remove the windshield. Usually a handful of screws or thumb bolts across the top of the fairing.
- Remove the inner fairing. On a batwing this is a set of screws around the perimeter plus the ones behind the windshield. Work slowly and keep the screws in order – they are not all the same length, and forcing a long one into a short hole cracks plastic.
- Disconnect the harness. Radio, switches, gauges. Take a photo before you unplug anything.
- Unbolt the old speakers. Note the wiring polarity – positive and negative reversed on one side makes the system sound thin and hollow rather than obviously wrong, so it is easy to miss.
- Fit adapter rings if you are going up in size. 5.25 to 6.5 needs them. Dry-fit before you commit.
- Connect and test before reassembly. Put the fairing back on and then discover a dead channel and you will take it off again.
Saddlebag speakers: half a day
The decision is whether to buy pre-cut lids or cut your own. Pre-cut lids cost more and save you the risk. If you are cutting, the usual method is a template, a step bit for the pilot holes and a jigsaw, taking your time on the radius.
Then you have to get power and signal from the front of the bike to the back. Run wiring along the existing harness route, use grommets wherever it passes through a panel, and leave enough slack at the bag hinge that opening the bag does not stretch the loom. A wire that chafes through against a frame rail six months later is the classic mistake here.
Amplifier: half a day, and do the power properly
Mount it somewhere with airflow that is not directly exposed to spray – inside the fairing, in a saddlebag, or under the seat depending on size. Then:
- Power comes from the battery, fused within a few inches of the positive terminal. Not from a switched accessory circuit that cannot carry the current.
- Ground to bare metal on the frame, sanded clean. Most amplifier noise complaints are ground problems.
- Use a remote turn-on lead so the amp shuts down with the ignition. Without it, the amp drains the battery while the bike sits.
- Keep power and signal wiring on opposite sides where you can, to avoid picking up alternator whine.
Tools worth having
Torx bits – Harley uses them everywhere. A trim removal tool so you do not scar the fairing. Heat-shrink and a proper crimper rather than twist connectors. A multimeter to confirm polarity before everything goes back together.
Tuning: Getting It to Sound Right at Speed
A system that sounds superb in the driveway can be unlistenable at 70 mph. Wind noise does not just make music quieter – it masks specific frequencies, and it rises faster than road speed does. Tuning for a motorcycle is a different job from tuning a car.
Set the gain properly, not by ear
Gain is not a volume control. It matches the amplifier’s input to the head unit’s output, and setting it too high is the most common cause of distortion that people then blame on the speakers. The method: set the head unit to about three-quarters volume, turn the amp gain down to minimum, then bring it up slowly until you hear distortion and back off from there. Do it with the bike stationary and the engine off.
Use a high-pass filter on the fairing speakers
Fairing speakers cannot reproduce deep bass, and feeding them low frequencies makes them work hard producing nothing except distortion and cone excursion. A high-pass filter around 80-100 Hz tells them to ignore what they cannot do. The result is cleaner midrange and speakers that last longer. If you have rear speakers or a sub, that is where the low end belongs.
Do not boost bass to compensate for wind
The instinct at speed is to add bass. It rarely helps, because what wind noise masks is the midrange – vocals, guitars, the parts that carry the tune. Boosting the mids and upper mids does more for intelligibility at speed than any amount of bass.
Tune at the speed you ride
Set a baseline in the garage, then do the real adjustment on a road at cruising speed, in the gear and at the throttle position you actually use. Many riders end up with two presets: one for town and one for the highway.
Break the speakers in
New speaker surrounds are stiff. Give them a few hours at moderate volume before deciding what they sound like or making final EQ decisions. It is a real effect, not audiophile folklore.
Weatherproofing and Maintenance
A motorcycle speaker lives outside permanently. It gets rained on, baked by the sun, vibrated constantly and sprayed with road salt. Car speakers are not built for any of that, and this is where cheap upgrades fail first.
What to look for before you buy
- Rubber surrounds, not foam. Foam surrounds rot. On a bike they can fail in a couple of seasons; rubber lasts.
- Treated or polymer cones. Untreated paper cones absorb moisture, sag and lose their shape.
- Sealed or coated magnet assemblies, to resist corrosion.
- A stated IP rating or explicit marine/powersports designation. If a listing says nothing about weather, assume it was designed for a car door.
Ongoing care
- Never pressure-wash speakers or grills. Water forced past a surround gets into the voice coil, and that is terminal. Rinse gently and let it drain.
- Check the mounting screws each season. Vibration loosens them, and a loose speaker buzzes in a way that sounds exactly like a blown one.
- Inspect wiring at the bag hinges. This is where chafing happens, and it usually announces itself as an intermittent channel rather than a clean failure.
- Cover the bike or park in shade where you can. UV is what kills cones and surrounds on a bike that lives outdoors.
- After a salted-road winter, rinse the grills and check the terminals for corrosion before the riding season.
If a speaker goes quiet
Before assuming it is blown, check the obvious: connector at the back of the speaker, ground at the amp, and the fuse. Intermittent faults on a bike are far more often a connection shaken loose than a failed component.
Harley Speaker Brands Compared
Rockford Fosgate
Harley’s long-standing audio partner, and the brand behind the branded Stage kits. Their Harley-specific lines are engineered around the factory head unit’s power and impedance rather than adapted from car audio, which is the practical difference. Prices are at the top of the range and the fitment is model-specific by design.
Hogtunes
A specialist that builds only for Harleys, and the brand riders reach for when they want a straightforward drop-in upgrade that works on stock power. Hogtunes speakers are designed to be efficient at low wattage, which is exactly the constraint a stock head unit imposes. They also make in-fairing Bluetooth controllers and amplifiers, so a whole system can stay on one brand.
Boss Audio
Dominant in the handlebar and crash-bar category rather than in fairings. Their bar-mounted pods have among the largest review bases in motorcycle audio, and they occupy a different niche: self-contained sound for bikes with no fairing, at a price where the decision is easy.
Cicada, Diamond, Arc Audio
The high-end specialists you see on show bikes and in the shops that build custom bagger systems. Genuinely excellent, priced accordingly, and mostly sold through installers rather than marketplaces.
Hertz, Kicker, JBL
Car and marine audio brands with motorcycle-adjacent lines. Quality is generally good, but check weather ratings and impedance carefully – a product designed for a car door makes different assumptions than one designed for a fairing.
Budget and import brands
Saddlebag lids, speaker pods and lower fairings from smaller manufacturers are a real and useful part of this market, particularly for bodywork where you are buying a plastic shell rather than a transducer. For the speakers themselves, the gap is bigger, and weather durability is where cheap options usually give themselves away.
Harley Speakers - FAQs
What size speakers does a Harley Street Glide take?
Do I need an amplifier for Harley speakers?
What is the best sound system for a Harley-Davidson?
What are the loudest speakers for a Harley?
Can I put 6.5-inch speakers in a 5.25-inch Harley fairing?
Why do my new Harley speakers sound worse than stock?
Are motorcycle speakers waterproof?
What does Stage 1, Stage 2 and Stage 3 mean for Harley audio?
How long does it take to install Harley fairing speakers?
Conclusion
Get the size right first: 5.25-inch for 1998-2013 fairings, 6.5-inch for 2014-up, 6×9 in the bag lids. That single fact prevents most of the wasted money in this category.
Then be honest about how you ride. If you want clarity around town, efficient Harley-specific speakers on the stock head unit will do it, and the job takes an hour. If you want to hear music properly at highway speed, you need an amplifier, and no speaker upgrade will substitute for it.
After that it is a question of how far you go: lower fairings for midbass, bag lids for rear fill and real low end, a tour pack if you carry a passenger. Wire it properly, fuse it at the battery, set the gain with the engine off, and give the speakers a few hours before you judge them.
#1 Pick: Best Harley Speakers
Rockford Fosgate TMS65 6.5" Fairing Speakers
For a 2014-or-later Touring bike, this is the straightforward answer: Rockford Fosgate is Harley’s own audio partner, the TMS65 drops into the factory location with no modification, and it is engineered around the stock head unit’s power and impedance so it works properly without an amplifier.
Riding a 1998-2013 bagger? The Hogtunes 352F-AA further down has 898 ratings, costs a third as much and is designed for the same low-power constraint. And whichever you fit, read the amplifier section first – it is the difference between a good upgrade and a disappointing one.